It was a Saturday during our grand opening in 2004 Eagle Leather had its record day for selling chaps. 68 pairs trimmed and sold in 8 hours. There were hundreds of pairs tried on and piled up on the floor, because we couldn’t get to people fast enough. Our staff was exhausted. That day made us find many shortcuts for fitting and trimming chaps, and here are our top tips for chaps.
Choosing a great pair.
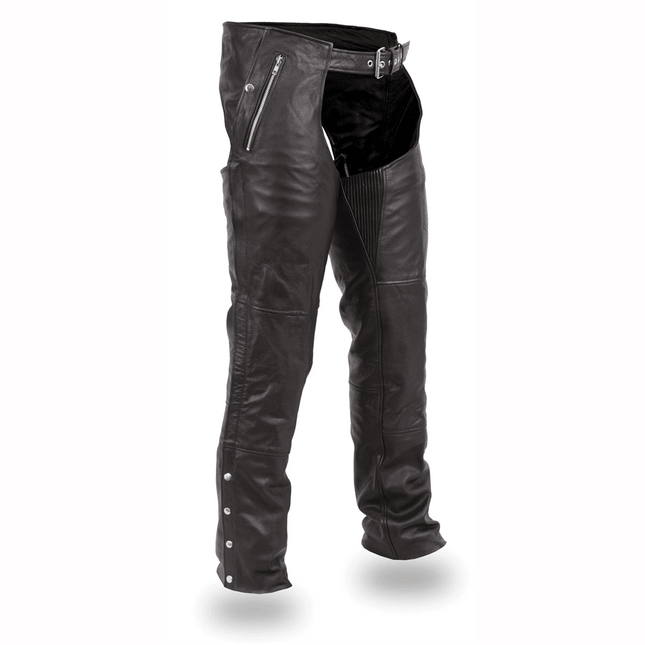
Leather quality is important for protection and comfort. Better leather takes less time to break in, and higher quality leather is less likely to fail in an accident.
Adjustable backs are better for layering and the ever so common problem we hear from customers of “My chaps shrunk”.
Slash or Crescent pockets allow you to keep the stuff from your pant pockets accessible when wearing chaps.
Stretch panel thighs maximize protection and comfort by giving with the body but keeping the chaps snug at the same time.
Removable liners offer greater flexibility for wearing your chaps. You can remove them when it is hot out and put them in when it is cold.
Vents are great for warm climates, but the trade off is more comfort, less protection.
Reflective accents will help you be seen at night, and if you ever end up off your bike in the dark unintentionally, a flashlight can pinpoint your location to anyone looking for you.
Putting chaps on.
Put the belt on first with the buckle in the center hole and centering the gap of the lacing on the spine. This will keep them from falling down and even so one leg isn’t tighter than the other.
Wrap the leg from the front between the legs, around the back, to the outside of the leg and fasten the zipper. A lot of people new to chaps want to start at the back and it doesn’t work out very well due to the design of chaps.
Zip the zipper down about an inch, straighten the chap leg, and finish zipping. This prevents the pant legs from being twisted and uncomfortable.
If you have a hard time fastening the zipper on your chap legs, zipping them down about an inch and stepping into them can save you a lot of hassle.
Snap as many snaps as you can. Many times, you won’t be able to snap the last snap, but this will reduce the chaps from flapping in the wind and the chance the zipper will start working its way up the leg.
Try squatting, sitting, or kicking your leg over the display bike before deciding. This will tell you if the chaps are going to be comfortable when riding or sitting.
A snug fit is a good fit. A tight or loose fit is a bad fit. Snug breaks in and becomes comfortable, too tight and you won’t wear them, and too loose will cause your legs to fatigue the longer the ride.
Trimming Chaps to Length
Get a partner to help you. It is impossible to get the right mark by yourself, because every time you lean to one side to see where they should be marked you are causing more material to be on the floor and when they are cut it will be shorter than you wanted.
Stand up straight feet shoulder width apart. Looking at a spot on the wall will help keep you from leaning causing the mark to be off.
Fold the chaps at the heel where they meet the ground and mark them as close to the snaps as possible. This provides you with maximum coverage without walking on the chaps.
Take the chaps off and snap the legs to transfer the mark to both edges of the chap. This will allow you to draw a straight line for cutting.
Match up both legs and transfer the mark before cutting. This will prevent you from having to repeat the steps for marking the second leg.
Lay the leg out flat with the outside completely visible, use a yard stick to match up the two marks on the edges, and draw a straight line between the marks. This ensures an even cut.
Use a sharp pair of scissors to cut across the line you drew. Using a paper cutter or knife will cause nicks and an uneven cut.
Do not cut both legs at the same time, either leg snapped up, or with one leg under the other. All of these can result in uneven, or damaged chaps and a new pair needing to be fit to correct the damage.
Punch a hole and use a rivet to prevent the cut seam from coming undone. Alternatively, you can sew the seam.
Do you have a tip we missed? Leave a comment and let us know. If you are looking for your first pair or a new pair of chaps, Shop Now!
Yet, there’s no denying it: Unless you plan to ride exclusively around the Southern United States, you’ll face some chilly winters. And even before it...